How to Sew a Lightweight Quilt: Two Quick and Easy Methods for Summer
I don't know nigh your household, only our bedding needs to change significantly with each season. The thing I've learned is this: not bad bedding is all about layering opportunities. This tutorial volition show you two very simple, informal ways to sew together a lightweight quilt that will exist perfect for the summertime season. This is the perfect project for anyone looking to spruce up your child'due south bedroom this summertime or renovate a guest bedroom before having visitors over to stay.
 View in gallery
 Two Fun DIY Quilt Projects for the Summer Months
 View in gallery
 A discussion of warning, though: If you lot're looking for instructions involving precision and perfection, I'd proceed your search. Because this sewing tutorial isn't that. This is a get-your-material-and-sew-the-quilt-at present kind of tutorial. Because I've got five young kids all on summer break right now and, frankly, ain't nobody got fourth dimension for perfection. We're in it for the hammocks and lemonade around hither.
 View in gallery
 This tutorial will walk you through two quilt-sewing methods. The first 1 is the inside-out flip method. The second is the straight seam fold-border. Let's get to it.
 View in gallery
 Materials Needed (for one twin-size quilt, either method):
- a – 2.5 yards of 45" cotton wool quilt cloth
- b – ii.five yards of 60" cotton quilt fabric
- c – two ~eleven" wide strips, each 2.five yards long
- d – warm & natural batting past the k, ~threescore"
- analogous thread
- pins, safety pins, scissors, sewing machine
How to Sew a Lightweight Quilt: step by step guide
 View in gallery
 Method #1: Within-Out Flip
 View in gallery
 This method involves sewing effectually the perimeter, turning the quilt right-sides-out, and sewing small stitch-points throughout the quilt to go along the batting in place.
 View in gallery
 Align the Long Edges
Begin by adjustment the long edges (selvedge, if at that place's selvedge on your 11" strips) of your Fabric A with one of your Material C strips. The correct sides should face each other.
 View in gallery
 Sew Edges Together
Sew these edges together, one Fabric C strip on each long side of Fabric A.
 View in gallery
 Lay Fabric A Downwards Flat
Lay Fabric A down flat on a big working surface (ahem, or the flooring), right side up.
 View in gallery
 Open the Fabric
Before you're done with this side, yous'll need to open up the Fabric C seams.
 View in gallery
 This will be one side of your quilt. Already done. Congratulations, it's coming along beautifully, isn't it?
 View in gallery
 Have Your Slice of Material B
Take your piece of Fabric B (2.5 yards of 60" wide, or the equivalent of 45" pieced together like the first section).
 View in gallery
 Lay it, centered, direct on pinnacle of Material Air-conditioning. The right sides should be touching. This is critical for this to work. Got it? The correct sides face each other, and the wrong sides face outward. Smooth out all sides. Pull taut everywhere.
 View in gallery
 One more time: the right sides are together.
 View in gallery
 Begin to Create the Warm & Natural Batting
An easy way to get the size of warm & natural batting that you need is to lay it, sideways, on your quilt fabric pieces. The fold volition run across the short length of your quilt. Line upwards batting stop to one side of your quilt then cutting the batting along the other side of your quilt.
 View in gallery
 Like and so. Now open the fold, and lay the batting, centered, on top of your quilt. You should be laying information technology on height of the incorrect side of Textile B.
 View in gallery
 Working with Your Quilt Sandwich
And then your quilt sandwich, at this indicate, will expect like this from the ground upwards: Cloth Air conditioning right-side-upwards, Fabric B correct-side down, batting.
 View in gallery
 Pull all edges and corners taut, taking care that there are no wrinkles hiding out in the center of your quilt anywhere. Now pin every 8"-10" or and so around the perimeter of your quilt at the betoken of the shortest slice of cloth/batting. Always check all 3 layers to make certain you're catching the shortest layer.
 View in gallery
 Sometimes when you lot become to a corner, the shortest fabric will switch (as in, another fabric might exist shorter all of a sudden).
 View in gallery
 Be sure to e'er find the shortest fabric, and pivot to that length.
 View in gallery
 Preparing to Commencement Sewing
I hope that, when you start sewing, you're going to desire to line up the edges. Just if yous've pinned them correctly, you can trust the pins rather than the mismatched edges. (This method is meant to be a time-saver for people who don't like to measure and cut and trim and all that. If yous detect that information technology stresses you out, however, you tin trim the edges to align with each other before sewing. Whatever brings you lot summertime joy.)
 View in gallery
 Pins volition wrap around the entire perimeter of your quilt.
 View in gallery
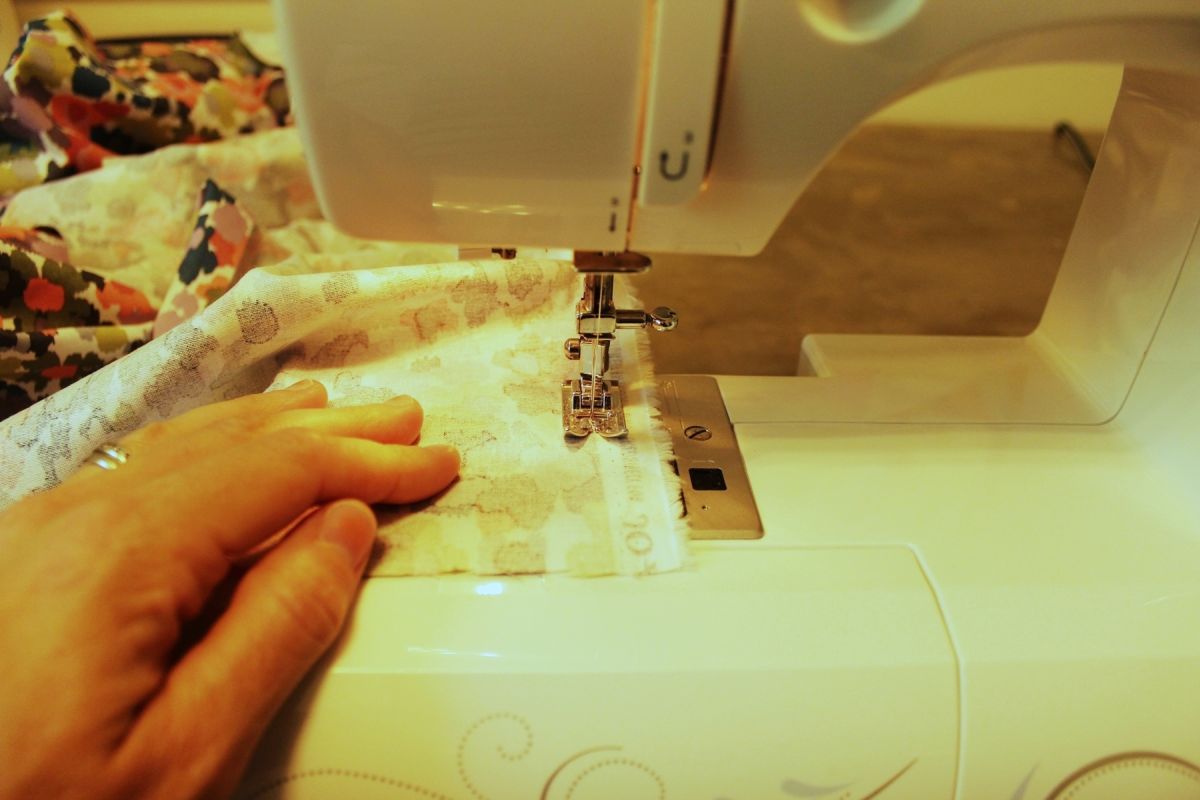
 Sew Around the Perimeter of your Quilt
Using the pins as your guide but likewise checking constantly, run up effectually the perimeter of your quilt. Exist certain to catch the shortest material. Also, leave near 18"-24" open up on one side.
 View in gallery
 It's not hard to keep an middle on the shortest fabric when you're sewing. Just a quick fold of the fabric every now and then, to keep your bearings. You might also be able to experience through the cloth, too.
 View in gallery
 In this example, I can feel both divide fabric edges through the batting and am using that as my main guide.
 View in gallery
 Get out an Opening in the Perimeter
Equally I mentioned, be sure to leave an 18"-24" opening in the perimeter.
 View in gallery
 Eliminate Some of the Majority
Feel free to cut the corner fabrics in a triangle (don't cut the corner seam itself), to eliminate some of the bulk that will happen when you plough the quilt right-sides-out.
 View in gallery
 Flip Your Quilt Correct-Sides-Out
Flip the quilt correct-sides-out, and poke out all corners to be foursquare.
 View in gallery
 Here's your quilt. Looking good, right? And then easy and then far. You're not far from being done, really. Nosotros need to have intendance of that opening first thing.
 View in gallery
 Close Off the Opening
Fold the edges of the opening in and pin them in identify. You take i of two options at this point: You can stitch merely the opening closed (mitt-sew with one of these seams if yous're fancy; Summertime Me is not), or you tin sew the entire perimeter of the quilt to give it a sort of banded border await.
 View in gallery
 I automobile-sewed the perimeter. (Distressing nigh the lighting shift at my sewing machine in these photos.)
 View in gallery
 The Concluding Stitches
With the entire perimeter finished off, the only affair y'all take left to do is make a few stitches in the body of your quilt to concur everything in place.
 View in gallery
 Lay your quilt flat again, and begin placing safety pins wherever y'all want them. Each safety pivot marks a point where you lot will make a small stitch with your machine, about one" long, to hold things together.
 View in gallery
 Add the Finishing Bear upon
When you take your safety pins in place for the unabridged trunk of the quilt, it'southward time to sew them.
 View in gallery
 Place your quilt into your machine at the point of ane of your safety pins. Make a 1" stitch line, reversing and stitching and so there are three or four passes along the line.
 View in gallery
 I found it easiest to not cut my thread at each transition merely instead simply lift the force per unit area pes and find the next nearest prophylactic pivot. Y'all can do what works best for yous.
 View in gallery
 I'll warn yous: It's easiest if you sew the pins in some sort of blueprint so you tin can keep track of what y'all've already washed and what safety pins still need stitches. Considering it gets a whole lot of material bunched upwardly with this method. Doable, for sure, and not too hard in reality. But a little messy.
 View in gallery
 Tidy Up Your Stitches
When you're done, snip both the thread ends at each stitch.
 View in gallery
 Your stitches will await something like this. Peppered all over the quilt body, which ways your quilt is at present finished.
 View in gallery
 A Fun Reversible Inside-Out Fold Quilt
This is what your reversible within-out fold quilt looks like. I dearest the reversible option here, with cute coordinating/contrasting fabrics.
 View in gallery
 The little 1" stitches all over your quilt are hardly noticeable, particularly on a busy print.
 View in gallery
 Fifty-fifty on a more straightforward fabric, the small stitches are camouflaged.
 View in gallery
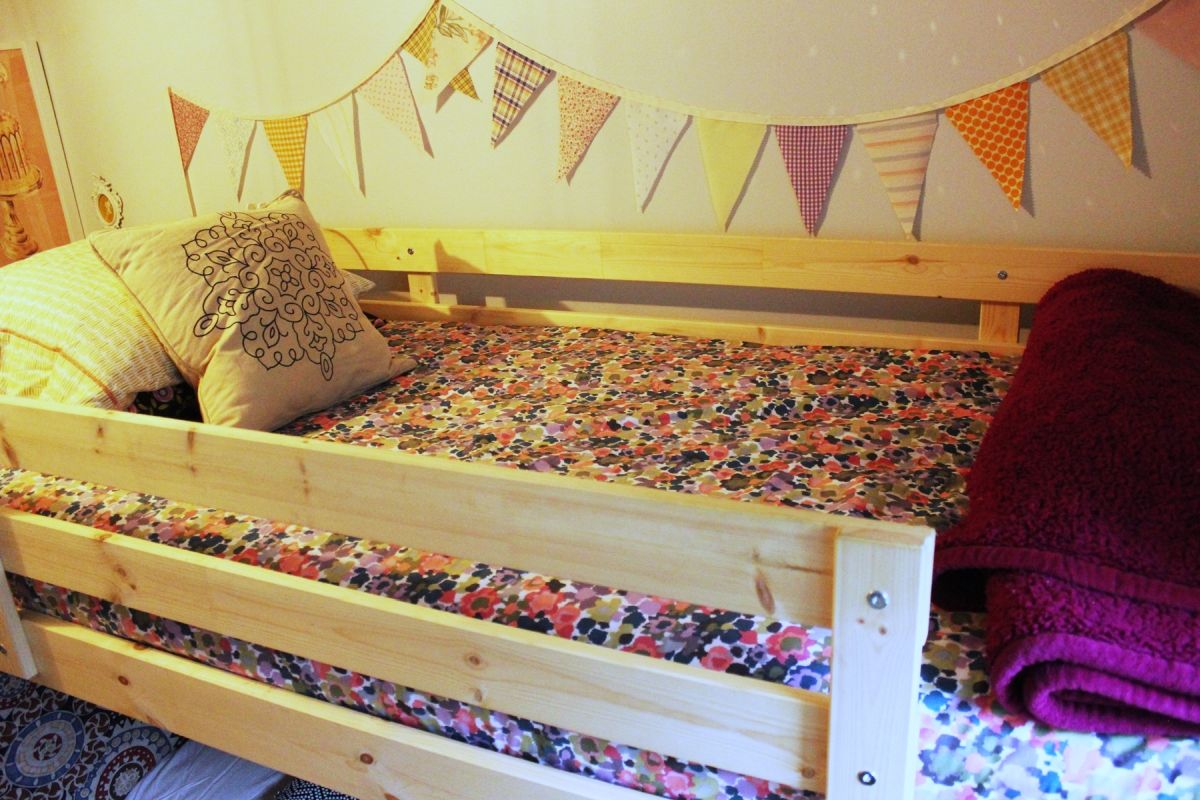
 The Finished Product
The bottom bunk bed here shows the inside-out flip method, with the small 1" stitch points.
 View in gallery
 The quilt itself is extremely lightweight because you have to use relatively lightweight batting in order to flip it inside-out most successfully.
 View in gallery
 I really like the coincidental vibe of the stitch points. My girl will probably flip it to the more flowery side, but I wanted to be able to evidence photos of what this ane looks like.
 View in gallery
 Method #2: Straight Seam Fold-Edge
 View in gallery
 This method involves sewing five seams long the quilt torso length, then folding over the edges and sewing them up. There is no flipping of the quilt involved.
 View in gallery
 Attach your Material C strips to Cloth A sides
Brainstorm by attaching your Fabric C strips to Fabric A sides, lengthwise. Place right-side downwards on a large working surface (aka, the floor).
 View in gallery
 Lay Your Batting Apartment on Top
Lay your batting (cut in the same fashion equally shown in Method one) apartment on top of the wrong side of your Fabric AC, then lay your Cloth B piece on top of that with the right side facing up. In other words, your two cloth pieces should have the right sides facing outward, with the batting sandwiched in the middle against the ii wrong sides.
 View in gallery
 Center All Pieces and Pin Your Quilt Body
Eye all pieces, then smooth everything out. Pin along the very middle, lengthwise, of your quilt body. Your pins demand to exist precisely aligned because these will guide your heart seam, which volition guide everything else.
 View in gallery
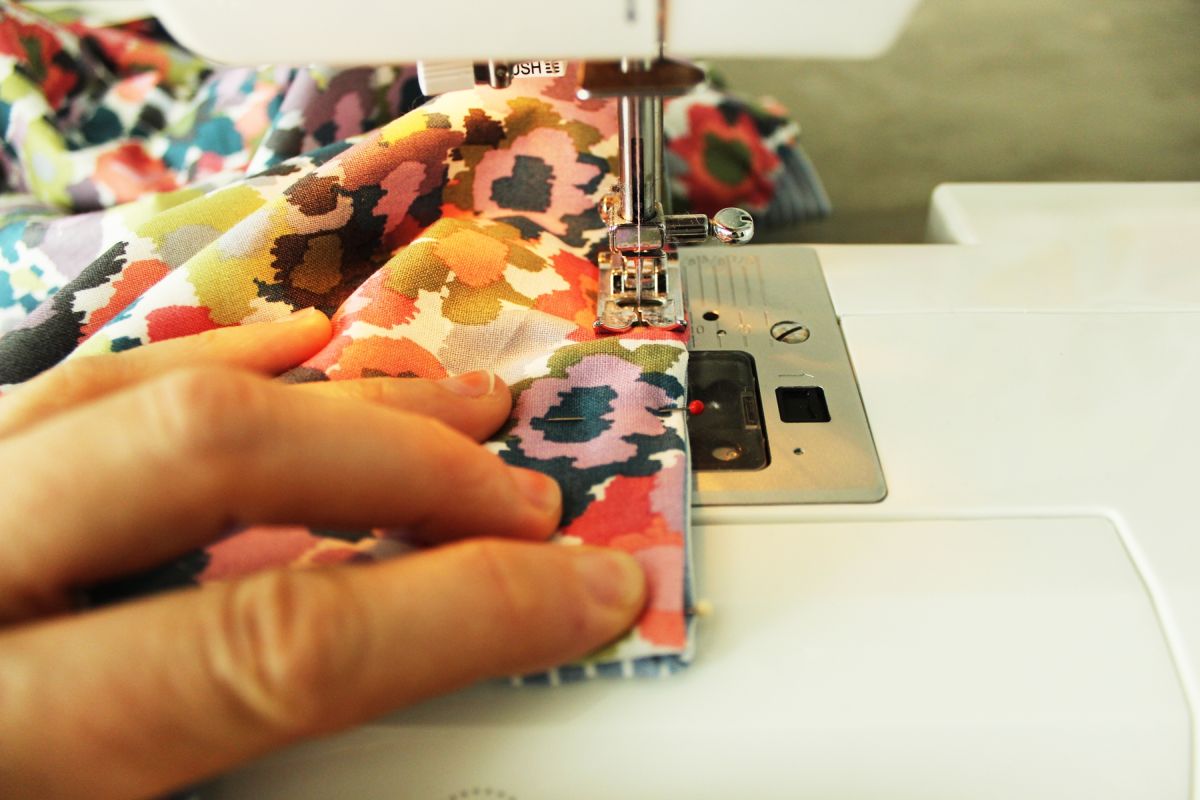
 Sew Your Directly Heart Seam
Placing your needle about iii" from the shortest textile edge, stitch your straight center seam lengthwise through the body of your quilt.
 View in gallery
 End your seam about iii" before the end of your shortest fabric edge.
 View in gallery
 Smoothen Your Textile and Pull Everything Taut
Lay your fabric out apartment again. Shine and pull everything taut. Use a ruler to plant your pins a specific distance from the center line (case used 12", although I'd recommend ten" for a more centered look).
 View in gallery
 Pin Placement
Place pins every 6"-viii", using your ruler with each pivot placement. Call up, yous'll exist using the heart of your pins to run up your direct seam, so exist precise with their placement. (In this case, precision doesn't accept whatever more than time or attempt than not-precision, if you're using a ruler anyway. And information technology'll make things so much nicer and easier in the long run. Your Summertime Cocky will corroborate.)
 View in gallery
 Sew the Seams
Sew the seam, directly down the center of each pin.
 View in gallery
 Repeat for all seams, for a total of 5 seams (including the center).
 View in gallery
 Cut Around the Edges
Lay your quilt out flat, pull everything taut and smooth, and so cut around the edges at the shortest cloth edge.
 View in gallery
 Cut around the entire perimeter and then that everything lines upwards. In this method, it's important to line everything up so you tin more easily fold in the edges and sew them.
 View in gallery
 Call back how you left well-nigh 3" from each brusque border when you were sewing your five long seams? That will exist important at present.
 View in gallery
 Create a Folded Hem-type Edge
Begin by folding up your bottom textile (plus batting, or you tin can choose to group the batting with the acme material. Doesn't actually matter) to create a folded hem-type edge.
 View in gallery
 Fold your Top Fabric
Next, fold your top fabric (plus batting, unless y'all did batting with the bottom fabric) downward then the folded border aligns evenly with the bottom folded edge.
 View in gallery
 Pin or Iron in Place
Pivot in place. Probably some people would recommend ironing this into place and pinning all the way effectually. I don't roll that way right at present; I pinned several feet to get a experience for it, but and so I decided I could sew the residue past feel. Feel complimentary to do what brings yous joy.
 View in gallery
 This is what your new folded "edge" volition expect similar before you sew. Pretty, isn't information technology?
 View in gallery
 Ooh, I demand to mention corners. Corners aren't as well tricky, simply they should be done with care. (Pivot these.) Begin by folding the bottom fabric (+batting?) downwardly by a triangle.
 View in gallery
 Create a Finished Corner
Then fold the 2 sides in, to create a finished corner. Pin in place.
 View in gallery
 Repeat the process, only with folding under, on the acme fabric.
 View in gallery
 The goal is to accept the two corner points align, with no raw edges showing.
 View in gallery
 Start Sewing the Perimeter
At present showtime sewing the perimeter where you've pinned. I recommend starting most x" after a corner; the corners can be used to prettily make up any differences that may occur during sewing the sides.
 View in gallery
 As you arroyo a corner, take care to keep everything aligned the way you lot've pinned it.
 View in gallery
 Sewing the Corners
Run up upwardly to the corner, then proceed your needle in the "downwardly" position. Lift your force per unit area foot and carefully spin your entire quilt fabric 90 degrees. Drib the pressure foot and begin sewing again. This keeps a precise corner seam at your, well, corner.
 View in gallery
 These corners may turn out perfectly. They also may plough out a little slightly rounded, or maybe even with a iii-way angle. Embrace the well-baked corner y'all've sewn, and and so try to keep all of them looking similar.
 View in gallery
 The Finished Seam
This is what your straight seam fold-edge quilt will look like when it's all complete.
 View in gallery
 Depending (again) on the decorated-ness of your print, the seam may be more or less obvious than this. But even if it's obvious, information technology'south a straight seam running lengthwise along your quilt torso, then it's no big deal if it's visible. It'due south crisp, orderly, and keeps everything in line. I similar the simplicity of this method, lots and lots.
 View in gallery
 The Finished Production – A Quick and Easy Quilt that Looks But Similar a Regular Quilt
This is what the straight seam fold-edge method quilt looks similar on a bed. Just like a regular quilt, right? Who tin can tell it only took an 60 minutes or 2 to make?
 View in gallery
 I happen to really similar the directly seams, even amid a more abstract pattern.
 View in gallery
 Cull Any Color or Design Yous Similar For Your Quilt
And, because we chose contrasting fabrics for each confront of the quilt, it's of course reversible. You tin go more subtle/neutral with the chambray pinstripe, or yous can be mod and girly with the abstract floral.
 View in gallery
 I love the way these lightweight summer quilts turned out; they are simple, fast, and fun. I can come across this as a nifty way to make a quick coating that would be perfect for a picnic, too.
 View in gallery
 I hope you enjoy your DIY reversible summer quilts… near as much as you enjoy your summertime itself. Summer is a great time to exercise a DIY project, and your whole family will benefit from these quick and easy lightweight quilts. Nosotros honey the way they look on the bunk beds in this projection, and they are the ideal mode to spruce up a invitee room in your home. The best thing about a lightweight quilt sewing project like this is that you tin can completely customize the quilt to fit your home décor. Become for a subtle colour scheme or for something a little bolder and brighter. Whatever fabric you go for, I'one thousand sure yous'll wow your family with their new lightweight quilts for the summertime flavour this year.
Happy DIYing!
pedersonminve1998.blogspot.com
Source: https://www.homedit.com/how-to-sew-a-lightweight-quilt/
0 Response to "How to Sew a Lightweight Quilt: Two Quick and Easy Methods for Summer"
Post a Comment